Friday, January 27, 2012

Beginning letter sounds

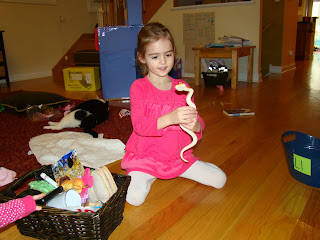
I created a monster.....Lila has me scrambling around every day now to do this with different letters.  I decided to start with the letters L,S and M for Lila, Sophia and Maddux (our dog).  I walked around the house and collected objects that began with those letters.   They would pick an item, say what it was and repeat the beginning sound.  Then it would go into the correct letter basket.
The loot and baskets....

sssssssssssssssnake


llllllllllllLila

It's ssssssssSophia

Yay! We did it!


Tracing S with glue and covering it with sugar


Macaroni M


We ran out of time for lemon print L!

Huff and Puff

One of the books that girls currently enjoy is The Three Little Pigs.  Every day Lila will point out things that a wolf could blow away and assure us that we were all safe in our house because it is made of bricks.  I took this as an opportunity to talk about the force of air and how it moves things.  We did a couple of different things to explore this. 
Here is what we used in our first experiment......

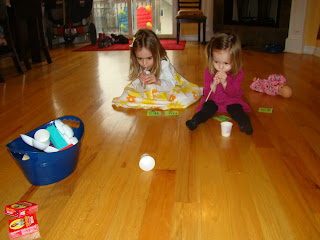
I gave them each a post it with "yes or no" on it.  They had to guess if it would blow away or if it wouldn't.  Each of them had a straw and used it to try to blow objects away.


A filled up balloon moved easily
A balloon that was not blown up did not move easily

Lila determined that things that were heavy would not move when we blew air on them.  Things that were light traveled far.


An empty cup moved all over!

A cup with water did not move.


The final sort of what moved and what didn't.

Will paint move?  Lila was a bit skeptical.


The thicker the paint, the harder it was to blow around.

I added a bit of water to thin out the paint and the fun began.


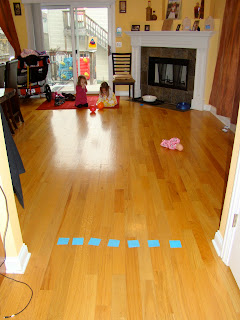
Balloon races!  Who is the fastest?  We used straws to blow the balloon to the finish line.


Obsessed with winning


We ended up ditching the straws.....

Feather racing


Cotton balls-Sophia decided to call it quits by then.
 It was a pretty fun morning for us!

Thursday, January 26, 2012

Fizzy science

Who doesn't have vinegar and baking soda on hand in their house?  This is an easy way to kill time if you don't mind a mess!  In the past we put the baking soda in a pan or on a plate and used droppers or squirt bottles to create a reaction.  They still ask to do it some times when they are bored. Add food coloring to the vinegar and you get even more fun.  It fizzes up every time the vinegar hits the baking soda-chemistry 101:)

For a little bit of variety, I taped 2 small cups together and cut a hole in the top.  (Think 3rd grade science class volcano)  I filled the bottom with baking soda and then gave each kid a squirt bottle of vinegar.  When it was done right, it was quite the thrill!  Some problems I ran across were: 1.  The girls putting the bottle directly into the hole blocked the fizz from coming out.  This lead to problem number 2-not getting the vinegar in the cup.  Vinegar was all over my table even before the cups had a reaction.  The girls loved it though and I had to make a second set of cups.  I think they would have done this over and over again.  It was really messy and we used a lot of vinegar and baking soda so I had to cut them off at two a piece. 
Love the look on her face!


Oh no, it's gone-or squirted on the table:)


Name painting

Notice the supervision to avoid these two from eating the sponge:)


This was a very easy art project.  Sophia wants to paint every day.  We were having friends over so I decided to get an easy painting project together to keep them busy.  I used electrical tape (because I didn't have thin painters tape) and taped each child's name onto a piece of poster board.  The kids used sponge piece to blot (or smear in some cases) the poster board.  I used a clothes pin to hold the sponge piece.  This project could obviously be done with any sort of object.  I just wanted to use something other than a paintbrush. When the painting was dry I peeled off the tape and it left their name in white letters!  Fun and easy!

Soap fun

I kept seeing a science experiment using Ivory soap on Pinterest.   One day while I was at the store I saw the soap by chance and thought I would give it a try.  The girls really loved it.  Who knew that if you microwaved the soap, it would grow and expand!?  Afterwords, we decided to try to make the soap crumbs into bath paint.  I found that idea here http://www.housingaforest.com/fluffy-bathtub-paint/.  It didn't work out so well for us only for the simple fact that we let it sit for a few hours instead of using it right away-duh.

First up:  open soap and put it on a microwavable plate.

We heated the soap 30 seconds at a time until it was done expanding-total 2 minutes or so.


We examined it by touching, smelling, etc.  Make sure it is completely cooled.  I found a small hot ball of soap in the middle of both puffs.
These were our observations


We broke the soap into crumbles and added it to our mixer.  I added boiling water to the soap.  See the above website for complete directions. 

We then added food coloring to the mixtures that I poured into small bottles.


The paint would have been perfect for the bathtub if we had used it right away.  We waited until bath time though and it had hardened back up.  I spent time trying to "remelt" our soap.  Oh well-lesson learned.